Thursday, 31 October 2013

Financiers


Financiers, or friands as they are called in Oz, originated in a pastry shop in Paris' financial district in 1890.  The pastry chef Lasne designed a tea cake that could be eaten on the run and without dirtying the suits of the time poor bankers and brokers who frequented his shop.


The original financiers were shaped like gold bars, as the original moulds were traditionally rectangular. Their name 'financiers' was based either on the clientele they were designed for, or the fact that they were expensive and only the wealthy could afford them.

The recipe itself is not very technical, but there are a few make or break pointers that I ought to share:

- when melting the butter, do so on a low heat and continue to let it cook, swirling it now and then until it starts to change colour to a nutty brown.  Allowing it to brown enhances the almond flavor.

- when mixing the batter, do so as little as possible.  If the gluten in the flour is activated, the result is a dense cake, rather than a light and fluffy texture.
- resting the batter in the fridge for a few hours before baking also assists in making a fluffier cake.

Preheat oven to 230 degrees Celcius. Grease the moulds with butter.

Mix the almond meal, orange rind, icing sugar and flour until combined.  Add the egg whites and mix until just incorporated.


Add the butter gradually and mix it into the batter.

Spoon the mixture into the moulds until they are half filled.  Rest in the fridge for a few hours. Top with fruit of your choice.


Place the mould into the oven for 5 minutes.  Reduce the heat to 200 degrees Celcius and bake for 15 minutes.  Turn off the oven and leave the cakes in the oven for a further 5 minutes.

Remove them from the oven and turn them out onto a wire rack to cool.


If you don't have a friand tray, a mini muffin tray may also be used.  The result is a light and fluffy cake which are delicious served either warm or cool.  


They keep in an airtight container for a few days.  The ingredients are as follows:

160g butter, melted
1 Cup almond meal
Grated rind of 1 orange
260g icing sugar, sifted
75g plain flour, sifted
5 egg whites
200g fruit of your choice (frozen berries can be used to top the friands)

Et Voila! A quick, yummy petites four that can be enjoyed at any time of the day.

Croissants and Pain aux Raisin


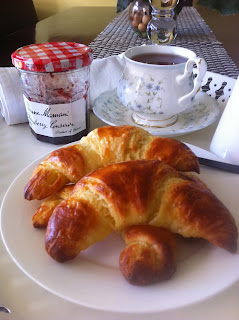
Croissants are one of the most beautiful creations in the pastry world.  Their history is probably the most disputed, with almost every European nation laying claim to them.  

The most historically correct version of events took place in Austria, during the battle of Vienna.  The city was under siege by the Turks.  Unable to penetrate the city walls, the Turks decided to dig tunnels under the city wall, in secret, and ambush the Austrians.  

Whilst digging their tunnels under the cover of night, they were heard by the bakers who were awake in the wee hours in their underground kitchens.  The city defenders were alerted and the Turks failed in their attempt to take Vienna. 

To celebrate, a pastry in the shape of a crescent (as seen on the Turkish flag) was created, giving us the croissant.

Croissants were introduced to France by the most famous French Austrian immigrant, Marie Antionette.

 Their popularity goes without saying..I've yet to meet a person who has not tried one and does not love them.


Attempting to make them has been intensive, with the battle between fresh and dry yeast being the main issue.  There are many recipes for both. Long story short, dry yeast wins.  It is more readily available, does not leave the finished product tasting like yeast and you yield the same level of rise.

To make, place flour into your mixer.  Make a well in the centre and add the yeast and milk.  Sprinkle a little bit of flour over the top and leave it for a few moments to bubble to ensure yeast activation (I would hate to think of someone going to all that trouble and the yeast is old and does not activate!)

Slowly add the water and melted butter.  Mix until combined. Add the salt and sugar and continue to mix until a sticky dough forms.

Knead the dough on a lightly floured bench for 10 minutes.  Dust dough with flour to reduce its stickiness.  Place the dough in a bowl, cover with plastic wrap and leave it to rise for a minimum of 3 hours, although I yielded better results when put in the fridge overnight.

Roll the dough into a rectangle that is 3 times longer than it is wider.  


Spread half the softened butter over the center third.  Fold the top third over the butter.  Spread the remaining butter onto the folded section and cover with the bottom third.


Turn the dough 90 degrees.  Roll the pastry to the same size it was originally (before the butter was added) and fold it in three again.  Cover in plastic wrap and refrigerate for 45 minutes.
Repeat this rolling out, folding and refrigerating process a total of 4 times.

Preheat the oven to 200 degrees Celcius.  Line a baking tray with baking paper.  


Roll out the dough into a rectangle that is 3mm thick.  Cut out triangles (the larger the triangle, the larger the croissant).


Roll each triangle (starting with the base) up onto itself to form a croissant.  Bend the ends in order to form a crescent shape.


Space the croissants out on the baking tray and leave them to rise.  When they have increased by 30% of their original size, coat with egg wash.


Bake for 10 minutes until golden.  Be warned, butter will bubble out of them while they are baking.  Transfer to a wire rack to cool.


The result is a light, crispy on the outside fluffy on the inside crescent of baked bliss.

The ingredients:

500g plain flour, sifted
7g dry yeast
1 Tbsp milk, lukewarm
260ml cold water
25g butter, melted
1 tsp salt
55g caster sugar
250g butter, softened
1 egg, beaten for egg wash


The making of this pastry can be utilised to make other products.  One in particular that I have chosen to focus on is pain aux raisins.


Pain aux raisins are by far my personal favorite.  I ate them all over France, and noted two major variations.  I found that they were either dense and bread like or light and layered.  I preferred the latter.  Researching them, I have found that they can be made using brioche dough or crossaint pastry.  

I have had a lot of fun making these and am quite pleased that I can make them.  They are beautiful eaten warm with glaze still dripping from them.  Here is the recipe:


Pain aux raisins

1 portion, crossaint pastry
1 cup raisins, soaked in warm water, drained

Pastry cream:
300g milk
100g caster sugar
1/4 cup plain flour
1/2 tsp salt
1 tsp vanilla essence

Glaze:
140g icing sugar
2-3 Tbsp water
1/4 tsp vanilla extract

Roll out the pastry to a rectangle measuring 15 x 20cm and 21/2 cm thick.

Make the pastry cream by mixing sugar, flour and salt together.  In another bowl, blend egg yolks together then whisk in the flour mix until combined.

In a medium saucepan, heat the milk until bubbles form on the edges.  Pour slowly into the flour mix, whisking constantly.  Place mixture back into the saucepan and onto medium heat.  Whisk continuously for 3 minutes until it is thickened.

Place plastic wrap over the pastry cream, with the plastic in direct contact with the cream.  Refrigerate until cold.

Spread the cream evenly over the dough.  Sprinkle raisins over the top of the cream.

Starting from the end furtherest away from you, roll the pastry towards you into a roll.  Cut off the ends to make them clean and even.


Cut the roll into ten equal slices, 2 cm wide.  (At this point you can wrap each piece individually in plastic wrap and freeze for 1 week.  To thaw, place in fridge overnight or onto the benchtop for 3 hours then proceed as follows).


On a baking tray lined with baking paper, place each piece cut side down, spaced evenly.
 
Cover lightly with plastic wrap and proof in a warm place for 2 hours until dough is light and airy.

Preheat oven to 180 degrees Celcius.  Bake in the centre of the oven for 20-30 minutes until golden.

Make the glaze by mixing ingredients together.  Spread the glaze liberally while they are still warm.


Saturday, 26 October 2013

Pastry, Pies and Tarts

Fruit Tarts
The ability to make your own pastry is so liberating. It opens up so many options, with each different type of pastry being able to be made into any number of recipes.

Whilst anyone can mix a list of ingredients together, it is the pastry skills and know how that are not included in the recipe that are important to master.  These skills can be applied to the making of all types of pastry.

Tip # 1

Always use unsalted butter.  By beginning with unsalted butter, you are able to control the taste of your pastry.  Too salty and its ruined! Need some salt? Then add some...

Tip # 2

Ensure any pastry that has butter incorporated into it has been refrigerated prior to rolling it out.  If the butter in a pastry is too warm, it looses its form and falls apart.

Resting in fridge

This makes the task of rolling the pastry out to a desired shape impossible.  If the butter is cold, the pastry will not stick to the bench when being rolled.

Tip # 3

When rolling out pastry, do not roll the pin over  the edge of the pastry.  Pinched ends are thinner than the rest of the pastry and cook faster than the rest.  This may result in blackened ends instead of a golden brown or may cause you to pull your tart out before the rest of the pastry is cooked through.

Tip # 4

Rather than moving your pin to roll out your pastry, move your pastry.  Rotating your pastry 90 degrees enables better utilisation of your biceps.  Always roll your pastry away from you.  This ensures even pressure is used and will not result in unevenly rolled pastry.


Tip # 5

If you need to roll out pastry to a particular shape, begin with your pastry in that shape.  After kneading your dough, use your hands to mould pastry into desired shape prior to rolling it out.

Tip # 6

Weigh your wet ingredients to ensure accuracy.  There's nothing worse than a bowl of clay due to miscalculation.  1 Cup = 250ml = 250g; 1 Tbsp = 20ml = 20g.

Tools of the Trade

Recipes

Sweet Shortcrust Pastry

200g butter
80g icing sugar
2 egg yolks
300g plain flour
iced water

Preheat oven to 200 degrees Celcius.  Grease and flour tart tin.

Using mixer, cream butter and icing sugar until pale and smooth.  Add yolks, one at a time, continue to mix until smooth.

Add sifted flour and enough iced water to just bring together with fingertips.

Tip onto bench, bring together and wrap in plastic wrap to rest for 1 hour.  Roll out to 5mm. Line tart mould and freeze.

Blind bake for 15 minutes on 200 degrees Celcius.  Remove baking beads and reduce temperature to 160 degrees Celcius and cook for 10 minutes.


Application - Chocolate Tart

350 ml thickened cream
150ml milk
3 eggs, lightly beaten
500g 70% chocolate

Place cream and milk in saucepan and boil.  Pour onto lightly beaten eggs and whisk to incorporate.

Pour onto chocolate and using spatula, work the cream into the chocolate until melted.

Pour into tart shell.  Tap to remove air bubbles and place into a preheated oven.  Turn off oven immediately.  Leave in oven for 30 minutes.

Refrigerate after it has cooled for a more solid finish or else, leave in a warm place for a gooey version.

Chocolate Tart
Shortcrust Pastry

260g plain flour
1/4 tsp salt
130g cold butter
60ml chilled water
1 egg yolk

Place flour and salt in bowl.  Cut butter into 1cm cubes.  Add to flour and use fingertips to combine until it resembles fine breadcrumbs.

Lightly whisk water and egg yolk together and add to flour and butter mix.  Using a rounded edge knife, mix to form a crumbly dough.

Tip onto bench and knead gently and briefly to form a smooth dough.

Roll out on lightly floured surface and line tin.

Refrigerate for 30 minutes to allow to rest, then cook as required.

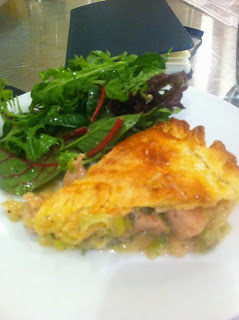
Chicken, Leek and Bacon Pie


Application - Chicken, Leek and Bacon Pie

60g butter
800g chicken thighs, chopped into 2cm cubes
1 sprig rosemary
250g leek, finely sliced
150g bacon rashes, cut into lardons
salt and pepper
2 Tbsp plain flour
60ml dry white wine
125ml chicken stock
125ml milk
1 large egg, whisked for brushing pastry

Melt half the quantity of butter in a large frying pan, add rosemary and sear chicken, seasoned with salt and pepper over high heat until coloured. Remove from pan.

Fry bacon in same pan with remainder of butter for 3 to 4 minutes, until it becomes crisp. 

Wash leek under running water. Drain and add to bacon in pan.  Cook for 5 minutes until soft.

Add flour to pan and turn heat to medium.  Stir to form a roux paste and fry for a minute.  Turn heat back to high and pour in wine.  Stir, allowing to sizzle for 30 seconds and then add stock and milk. Add reserved chicken and rosemary.

Season and bring to a boil, stirring well to remove lumps in sauce.  Chill filling until cold.

Preheat oven to 200 degrees Celcius.  

Brush rim of pastry case. Fill raw pastry case with chilled chicken mixture. 

Roll out "lid" and place on top of pie.  Pierce lid 3 or 4 times with a sharp knife to allow steam to escape whilst cooking.  Bake for 30 to 40 minutes until golden.

Sweet Shortcrust Pastry

250g plain flour
pinch of baking powder
pinch of salt
80g caster sugar
160g cold butter, cut into cubes
1 egg
1/2 tsp vanilla extract

Sieve flour and baking powder together.  Add sugar and mix.  Rub in butter until it resembles fine breadcrumbs.

Lightly beat egg and stir into flour mixture with extract.  Do not overmix at this stage.  Tip onto bench before dough has formed.

Lightly and briefly knead pastry, until smooth.  Line tin and and refrigerate.
Rasberry Almond Tarts prior to baking

Application - Rasberry Almond Tarts

100g butter at room temperature
100g caster sugar
2 eggs
30g plain flour
1/2 tsp vanilla paste
100g almond meal
125g frozen rasberries
 

Preheat oven to 180 degrees Celcius.

Place butter and sugar into mixer and beat for a few minutes, until light and fluffy.

Add eggs, one at a time, adding flour and vanilla paste with second egg.  Beat for a few minutes, until smooth.  Add almond meal and mix briefly to combine.

Fill tart shells  to 3/4 capacity and spread using back of a spoon. Place rasberries into mixture.

Bake for 25-30 minutes, until golden and slightly puffed. Cool on wire rack and remove from tins.

Puff Pastry

640g plain flour, sifted
60g butter, melted
320ml water
2 tsp salt
dash of white vinegar
500g butter, softened

Place flour into a bowl.  Make a well and add melted butter, sugar, salt and vinegar.

Mix together then knead on bench for 5 minutes until it becomes smooth and elastic.  Wrap in plastic and refrigerate overnight.

Using a rolling pin, roll dough outwards to a 1/2 cm thickness.  Turn the dough three times, each time repeating this so that it forms a large square with four rounded petals around a slightly thicker centre.
Adding the butter to the 'flower'
 

Shape the butter so that it sits in the centre.  Fold the four petals over the centre to cover the butter, pinching the edges to hold the butter in.

 On a lightly floured surface, turn the dough over and roll it out until it is three times longer than it is wider.

Fold the dough into thirds.  Give the square a quarter turn so the folded seams are on the sides.  Repeat the sequence of rolling out and turning .   Wrap in plastic and refrigerate for 45 minutes.

Repeat the turning and rolling process another two times and rest again in the refrigerator for 45 minutes.  Repeat once more, making it a total of 6 times.  Rest the dough for 3 hours before using.

Application - Palmiers

400g puff pastry
egg wash (1 egg yolk, 1 egg and 50ml milk combined)
icing sugar, sifted

Roll out pastry onto floured bench until it is 2mm thick, forming a rectangle three times longer than it is wider.  Brush with egg wash and sprinkle generously with icing sugar.

Fold the edges of the pastry to meet in the middle, forming a square with a vertical seam down the middle. Brush again with egg wash and sprinkle with sugar.  Fold the pastry in half along the vertical seam. Refrigerate for 30 minutes.

Preheat oven to 200 degrees Celcius and line a baking tray with baking paper.

While still cold, cut the pastry into 1cm thick slices.  Place the slices cut side up and fold the outer ends around to meet in the middle.  

Place them on a tray and cover them with a sheet of baking paper.  Place another tray on top to prevent them from rising whilst baking.


 Cook for 10 minutes.  Gently take off the top tray and baking paper.  Turn each biscuit over and cook, uncovered for a further 3 minutes until they are caramelised and golden in colour.


There are so many ways in which to apply these recipes..I've included a few photos of a few of the things I've made in recent days.  It's truly been a tasty learning curve!

Tarte Tartin
Lemon Meringue Tart


Tarte au Citron
Quiche

Choc Rasberry Tart
I was recently asked the question "why make it when you can buy it?" My response to this is that when you make it, you know you can! You'll never know if you never try.... Happy Baking!

Thursday, 10 October 2013

Choux

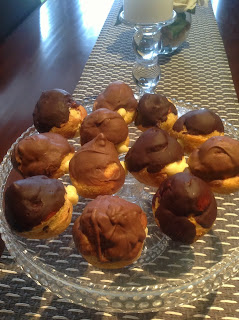
Profiteroles
 
Choux (pronounced 'shoe') pastry is one of those versatile items that every budding chef should have as a part of their repertoire.  There is so many things that can be made with them:
  •  Profiteroles and eclairs when stuffed with pastry cream
  •  Croquembouche
  •  Crullers
  • Beignets when fried
  • St Honore Gateau when topped with cream
  •  Paris Brest when ring shaped and filled with cream (this was developed by a patisserie chef who lived near the Tour de France route and made the bicycle wheel shaped cake in the race's honour)
  • Religeuses when coffee flavoured
  • Gourgeres when filled with cheese and savory fillings
White Choc Eclairs
  
The origins of choux began with the head chef of Catherine de Medici, she was the Italian woman who married a French King and took her entire court with her to France when she moved.  In 1540, Chef Panterelli invented a cake named Pate a Panterelli which used a hot pastry.  Chef Avice made various variations and produced Choux buns, named because they resembled cabbages (Choux being the french word for cabbage).  It was Antoine Careme in the 19th century who perfected the recipe to what we use today.


Choux pastry has no rising agent. As it is a moist dough, steam is used as the leavener, which is why you cannot open the oven door whilst they are baking.

Dry ball of pastry
 
The process begins by combining the milk, butter, salt and sugar in a saucepan. Bring it to the boil.  Remove from the heat and add in the sifted flour.  Mix well and place it back on a medium heat.  Cook the dough, stirring with a wooden spoon until the dough resembles a dry ball.

Transfer the dough to a bowl.  Add the eggs, one at a time, mixing well between each addition.


 In order to shape the dough, place it into a piping bag with a large nozzle attached.  In these examples, I shaped round balls for profiteroles and long sausage shaped dough for eclairs.


Bake in a preheated oven for 30 minutes at 190 degrees Celcius.  Turn down oven to 150 degrees Celcius and bake for a further 15 minutes.

Cool on a wire rack, fill with cream of your choice and top with chocolate. A french patisserie chef who lives in Perth gave me a hint that I will share with you..if you slit the choux as soon as they come out of the oven, it allows the steam to escape which means you are not left with soggy pastry.

Initially, I sliced my choux down the middle and sandwiched cream between the two layers.  This proved to be very messy when eating them.  
Sandwiched creme

How the professionals fill them


When I consulted with my local choux specialist, I found them to be piercing the whole choux and piping cream into the pastry.  The commercially made choux were very light and fluffy, as were mine.  Their pastries were decorated beautifully, whereas mine could have been better topped, but when it came to the filling, my creme patissier was creamy and tasted of vanilla.  The store bought choux cream filling tasted eggy.

Mim made

Store Bought


Well, there it is.  Here are the ingredients for you all to try:

200 ml full cream milk
90 g unsalted butter
1 tsp salt
1 tsp sugar
120 g plain flour
 3 eggs


Well, there's nothing left for you all to do but have a go yourselves, and you too can enjoy the fruits of your labour!

Taste Testing